

")

")


How to Edit Videos on iPhone: A Complete Step-by-Step Guide

Introduction
In today’s digital age, capturing and sharing videos has become second nature—especially on the iPhone, a device renowned for its powerful camera and user-friendly interface. Whether you’re a casual user wanting to polish a vacation clip or a content creator aiming for professional-grade edits, knowing how to edit videos on iPhone is essential. The convenience of editing videos directly on your device means you can create stunning content anytime, anywhere, without needing a computer.
This comprehensive guide will walk you through everything you need to know about video editing on iPhone. From understanding basic concepts to mastering built-in tools like the Photos app and iMovie, and exploring top third-party apps, this article equips you with the knowledge to produce polished videos effortlessly.
—
Getting Started with Video Editing on iPhone
Before diving into editing, it’s helpful to familiarize yourself with core concepts and technical details that will make the process smoother and more effective.
Understanding Basic Video Editing Terms
Here are some common video editing terms explained simply:
– Trimming: Cutting out unwanted parts from the beginning or end of a video clip.
– Cropping: Adjusting the visible frame of the video to remove edges or change the aspect ratio.
– Transitions: Visual effects that smooth the change from one clip to another (e.g., fade, dissolve).
– Overlays: Adding extra elements on top of the video, such as text, images, or graphics.
– Audio Tracks: Separate layers of sound that can include music, voiceovers, or sound effects.
Understanding these basics will help you navigate editing tools more confidently.
Supported Video Formats and Resolutions on iPhone
iPhones natively support several video formats, primarily:
– HEVC (H.265): Efficient compression for high-quality videos, especially on newer models.
– H.264: Widely compatible format used for most videos.
– MOV and MP4 containers: Common video file types compatible with iPhone apps.
Regarding resolution, iPhones can record and edit videos in:
– 720p HD
– 1080p Full HD
– 4K Ultra HD (available on newer models)
Choosing the right format and resolution affects video quality and file size, which is important when editing and exporting your final video.
—
Editing Videos Using the Built-in Photos App

The Photos app on iPhone offers surprisingly powerful video editing features for quick and basic edits, making it ideal for beginners.
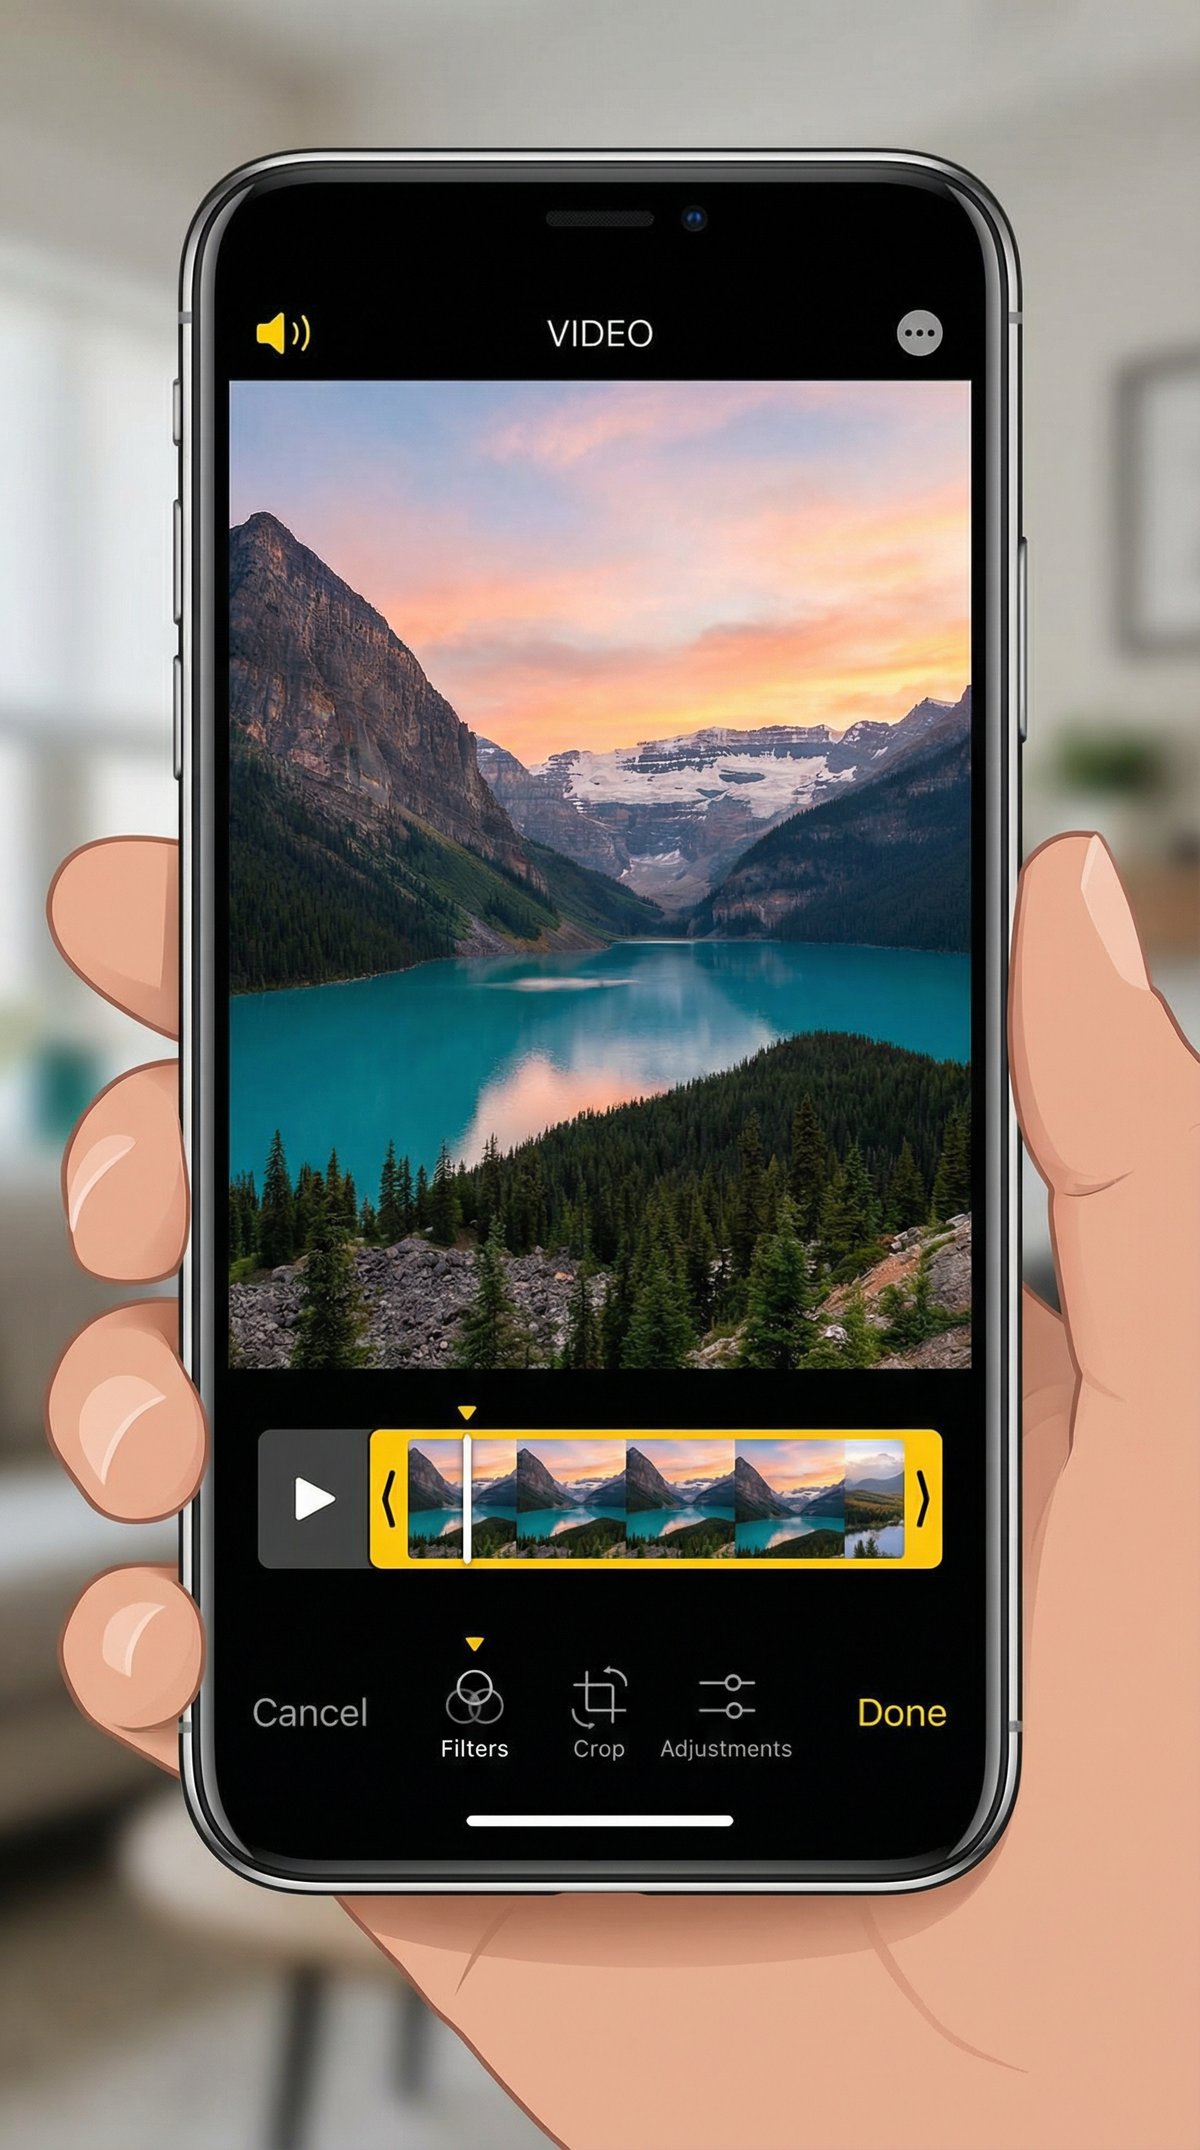
How to Trim and Crop Videos
Follow these steps to trim and crop videos in the Photos app:
1. Open the Photos app and select the video you want to edit.
2. Tap Edit in the top-right corner.
3. To trim, drag the yellow handles on the timeline at the bottom to select the start and end points.
4. To crop, tap the Crop icon (square with arrows) at the bottom.
5. Adjust the frame by dragging the edges or using preset aspect ratios.
6. Tap Done to save your changes.
Adjusting Color, Brightness, and Applying Filters
Enhance your video’s look by adjusting its visual settings:
1. In the Edit mode, tap the Adjust icon (dial-like symbol).
2. Use sliders to tweak exposure, brightness, contrast, saturation, and more.
3. To apply filters, tap the Filters icon (three overlapping circles) and scroll through options like Vivid, Dramatic, or Mono.
4. Preview changes in real time and tap Done to apply.
Rotating and Flipping Videos
To correct orientation or add creative flair:
1. In the Edit screen, tap the Crop icon.
2. Tap the Rotate button (square with an arrow) to rotate your video 90 degrees per tap.
3. To flip horizontally, tap the flip icon (triangle with an arrow) if available.
4. Confirm by tapping Done.
Adding Text and Simple Effects
The Photos app offers limited text options but has improved with recent iOS updates:
– You can add Live Text or use Markup to draw or write on video still frames.
– For adding actual text overlays to videos, you’ll need to use apps like iMovie or third-party editors.
—
Advanced Editing with iMovie on iPhone

For users seeking more control and creative options, iMovie is Apple’s free, powerful video editing app available on iPhone.
Creating a New Project and Importing Clips
To start editing in iMovie:
1. Open iMovie and tap the + button to create a new project.
2. Select Movie from the options.
3. Browse your video library and tap clips to add them to your project.
4. Tap Create Movie to enter the editing timeline.
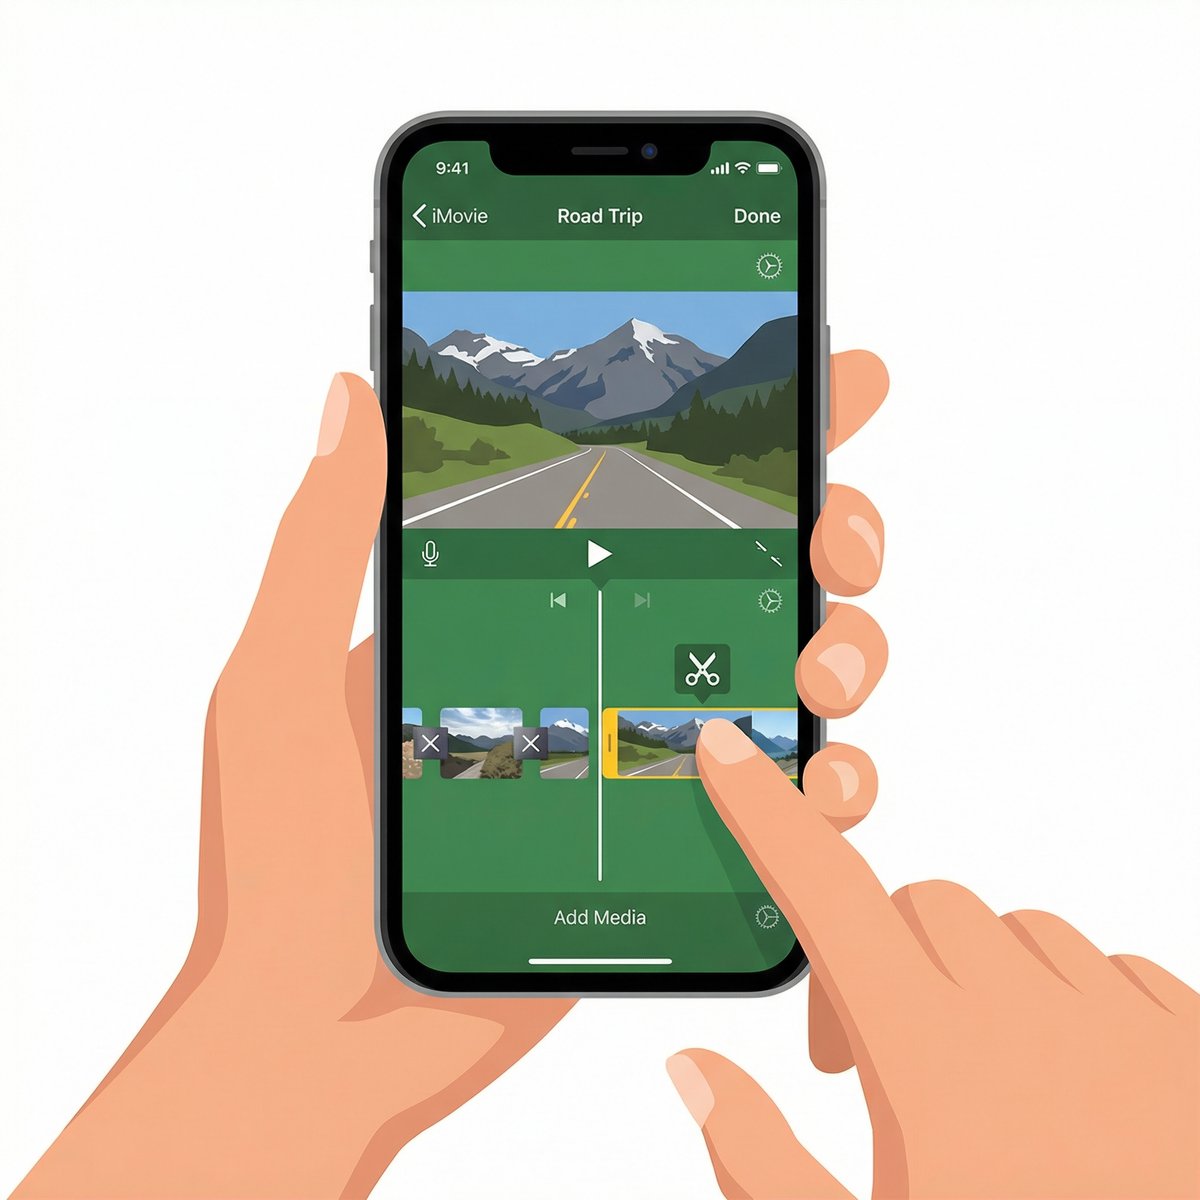
Splitting, Rearranging, and Trimming Clips
Enhance your timeline editing skills:
– Splitting: Tap a clip, move the playhead to the desired split point, then tap Split.
– Rearranging: Press and hold a clip, then drag it left or right to change its order.
– Trimming: Drag the edges of a clip in the timeline to shorten or extend it.
Adding Transitions and Effects
Smooth scene changes and add polish:
1. Tap the small icon between clips to select a transition (e.g., dissolve, slide).
2. Adjust transition duration if needed.
3. Apply video filters and effects by selecting a clip and tapping the Filters icon.
Inserting Titles, Text Overlays, and Voiceovers
Make your videos more engaging:
– Tap Titles to add pre-designed text animations at the start, middle, or end.
– Add text overlays by selecting a clip and choosing the Text option.
– Record voiceovers by tapping the microphone icon and recording directly into your project.
Adding and Editing Audio Tracks
Sound is key to a great video:
– Tap Add Media > Audio to insert music or sound effects.
– Adjust volume levels by tapping the audio clip and using the volume slider.
– Fade audio in or out for smooth transitions.
—
Best Third-Party Video Editing Apps for iPhone
If you want even more advanced features, several third-party apps stand out for iPhone video editing.
Overview of Top Apps
– LumaFusion: A professional-grade editor with multi-track timelines, advanced color correction, and robust export options. Ideal for serious creators.
– InShot: User-friendly with powerful features like trimming, filters, transitions, and social media export presets. Great for quick edits and social videos.
– Adobe Premiere Rush: Cross-platform app with cloud syncing, multi-track editing, and Adobe Creative Cloud integration. Perfect for users familiar with Adobe products.
– Splice: Simple interface with a focus on quick edits, music integration, and effects. Suitable for beginners.
– KineMaster: Offers multiple layers, chroma key, and speed controls. Good for intermediate users.
Features Comparison Table
| Feature | LumaFusion | InShot | Adobe Premiere Rush | Splice | KineMaster |
|————————|——————-|——————|———————|——————|——————|
| User-Friendliness | Moderate | Very Easy | Easy | Very Easy | Moderate |
| Multi-Track Editing | Yes | No | Yes | No | Yes |
| Advanced Color Grading | Yes | Limited | Limited | No | Moderate |
| Text & Titles | Yes | Yes | Yes | Yes | Yes |
| Audio Editing | Advanced | Basic | Moderate | Basic | Advanced |
| Export Options | Customizable | Social presets | Adobe Cloud & Social | Social presets | Customizable |
| Pricing | Paid (one-time) | Free + IAP | Subscription-based | Free + IAP | Free + IAP |
How to Choose the Right App for Your Needs
Consider these factors when selecting an app:
– Skill Level: Beginners may prefer InShot or Splice; advanced users benefit from LumaFusion or KineMaster.
– Editing Requirements: For multi-track editing and professional features, LumaFusion is best.
– Budget: Free apps with in-app purchases work well for casual users; professionals might invest in paid apps.
– Platform Integration: Adobe Premiere Rush is ideal if you use Adobe Creative Cloud elsewhere.
—
Exporting and Sharing Your Edited Videos
Once your masterpiece is ready, exporting and sharing are the final steps.
Choosing the Right Export Settings
– Resolution: Export at the highest resolution your video supports (1080p or 4K) for best quality.
– Format: Use widely compatible formats like MP4 (H.264) for easy sharing.
– Quality: Balance quality and file size; higher bitrates mean better quality but larger files.
Saving Videos to Your Device or Cloud
– Save directly to your Photos library for easy access.
– Upload to cloud services like iCloud Drive, Google Drive, or Dropbox for backup and sharing.
– Most apps offer direct export to these platforms within the sharing menu.
Sharing Directly to Social Media Platforms
iPhone apps allow seamless sharing:
1. Tap the Share icon after exporting.
2. Select platforms like Instagram, TikTok, Facebook, or YouTube.
3. Follow prompts to post your video without leaving the app.
—
Tips, Tricks, and Troubleshooting
Enhancing Video Quality on iPhone
– Use Natural Lighting when filming to reduce noise.
– Apply color grading in apps like iMovie or LumaFusion to improve mood and consistency.
– Use keyframes in advanced apps to animate effects smoothly.
Common Editing Mistakes to Avoid
– Overusing filters or transitions, which can distract viewers.
– Ignoring audio levels—ensure voice and music are balanced.
– Exporting at low resolution, resulting in blurry videos.
Troubleshooting Video Editing Issues on iPhone
– If an app crashes, restart your iPhone or reinstall the app.
– For export failures, check available storage and try lowering export resolution.
– Unsupported formats can be converted using apps like VLC or online converters before editing.
—
Conclusion
Learning how to edit videos on iPhone opens up a world of creative possibilities right at your fingertips. Whether you stick to the built-in Photos app for quick fixes, dive into iMovie for more control, or explore powerful third-party apps like LumaFusion, the iPhone offers tools for every skill level. By understanding basic editing concepts, mastering app features, and following best practices for exporting and sharing, you can create polished, professional-quality videos anytime, anywhere. Keep experimenting and practicing—your next great video is just a few taps away.
—
FAQ
Q: Can I edit 4K videos directly on my iPhone?
A: Yes, newer iPhone models support 4K video recording and editing natively in apps like Photos and iMovie.
Q: Is iMovie free to use on iPhone?
A: Yes, iMovie is a free app available on all iPhones and offers advanced editing features without additional cost.
Q: Which video editing app is best for beginners on iPhone?
A: InShot and Splice are excellent choices for beginners due to their intuitive interfaces and easy-to-use features.
Q: How do I add music to my iPhone video edits?
A: You can add music using iMovie or third-party apps by importing audio tracks and adjusting their volume in the timeline.
Q: Why does my video export fail sometimes?
A: Export failures can be caused by insufficient storage, incompatible formats, or app glitches. Restarting the app or freeing up space often resolves the issue.
Q: Can I add text overlays in the Photos app?
A: The Photos app has limited text and markup options. For dynamic text overlays, apps like iMovie or InShot are better suited.
—
By following this guide, you’ll confidently navigate the world of iPhone video editing, producing captivating videos that stand out. Happy editing!