


Snipping in Mac, also known as taking screenshots, allows you to capture and save a portion of your screen or the entire screen. It’s a useful feature for creating visual documentation, sharing ideas, and capturing important information.
How to snip on a Mac using hotkeys
In the realm of digital screenshots, the Mac’s built-in snipping tool is a hidden gem. But for those of us who prefer to keep our hands on the keyboard, the default hotkeys can be a bit of a hassle. Fear not, my fellow keyboard enthusiasts! Here’s a guide to snipping on a Mac using hotkeys that will make you feel like a digital ninja.
First, let’s get the basics out of the way. To take a screenshot of the entire screen, simply press Command + Shift + 3. For a partial screenshot, press Command + Shift + 4, then drag your cursor to select the area you want to capture.
Now, for the fun part. To take a screenshot of a specific window, press Command + Shift + 4, then press Spacebar. Your cursor will turn into a camera icon. Hover over the window you want to capture and click. Voila! You’ve got a screenshot of just that window.
But wait, there’s more! If you want to capture a screenshot with a delay, press Command + Shift + 4, then press the Spacebar twice. This will give you 10 seconds to position your cursor and select the area you want to capture.
And finally, for the ultimate keyboard shortcut, press Command + Shift + 5. This will open the Screenshot app, which gives you even more options for customizing your screenshots. You can choose to capture the entire screen, a window, or a portion of the screen. You can also set a timer, add annotations, and save your screenshots in various formats.
So there you have it, my fellow keyboard warriors. With these hotkeys, you can snip and capture like a pro. No more fumbling with the mouse or reaching for the trackpad. Just sit back, relax, and let your fingers do the snipping.
How to take a snip on a Mac with the screenshot toolbar
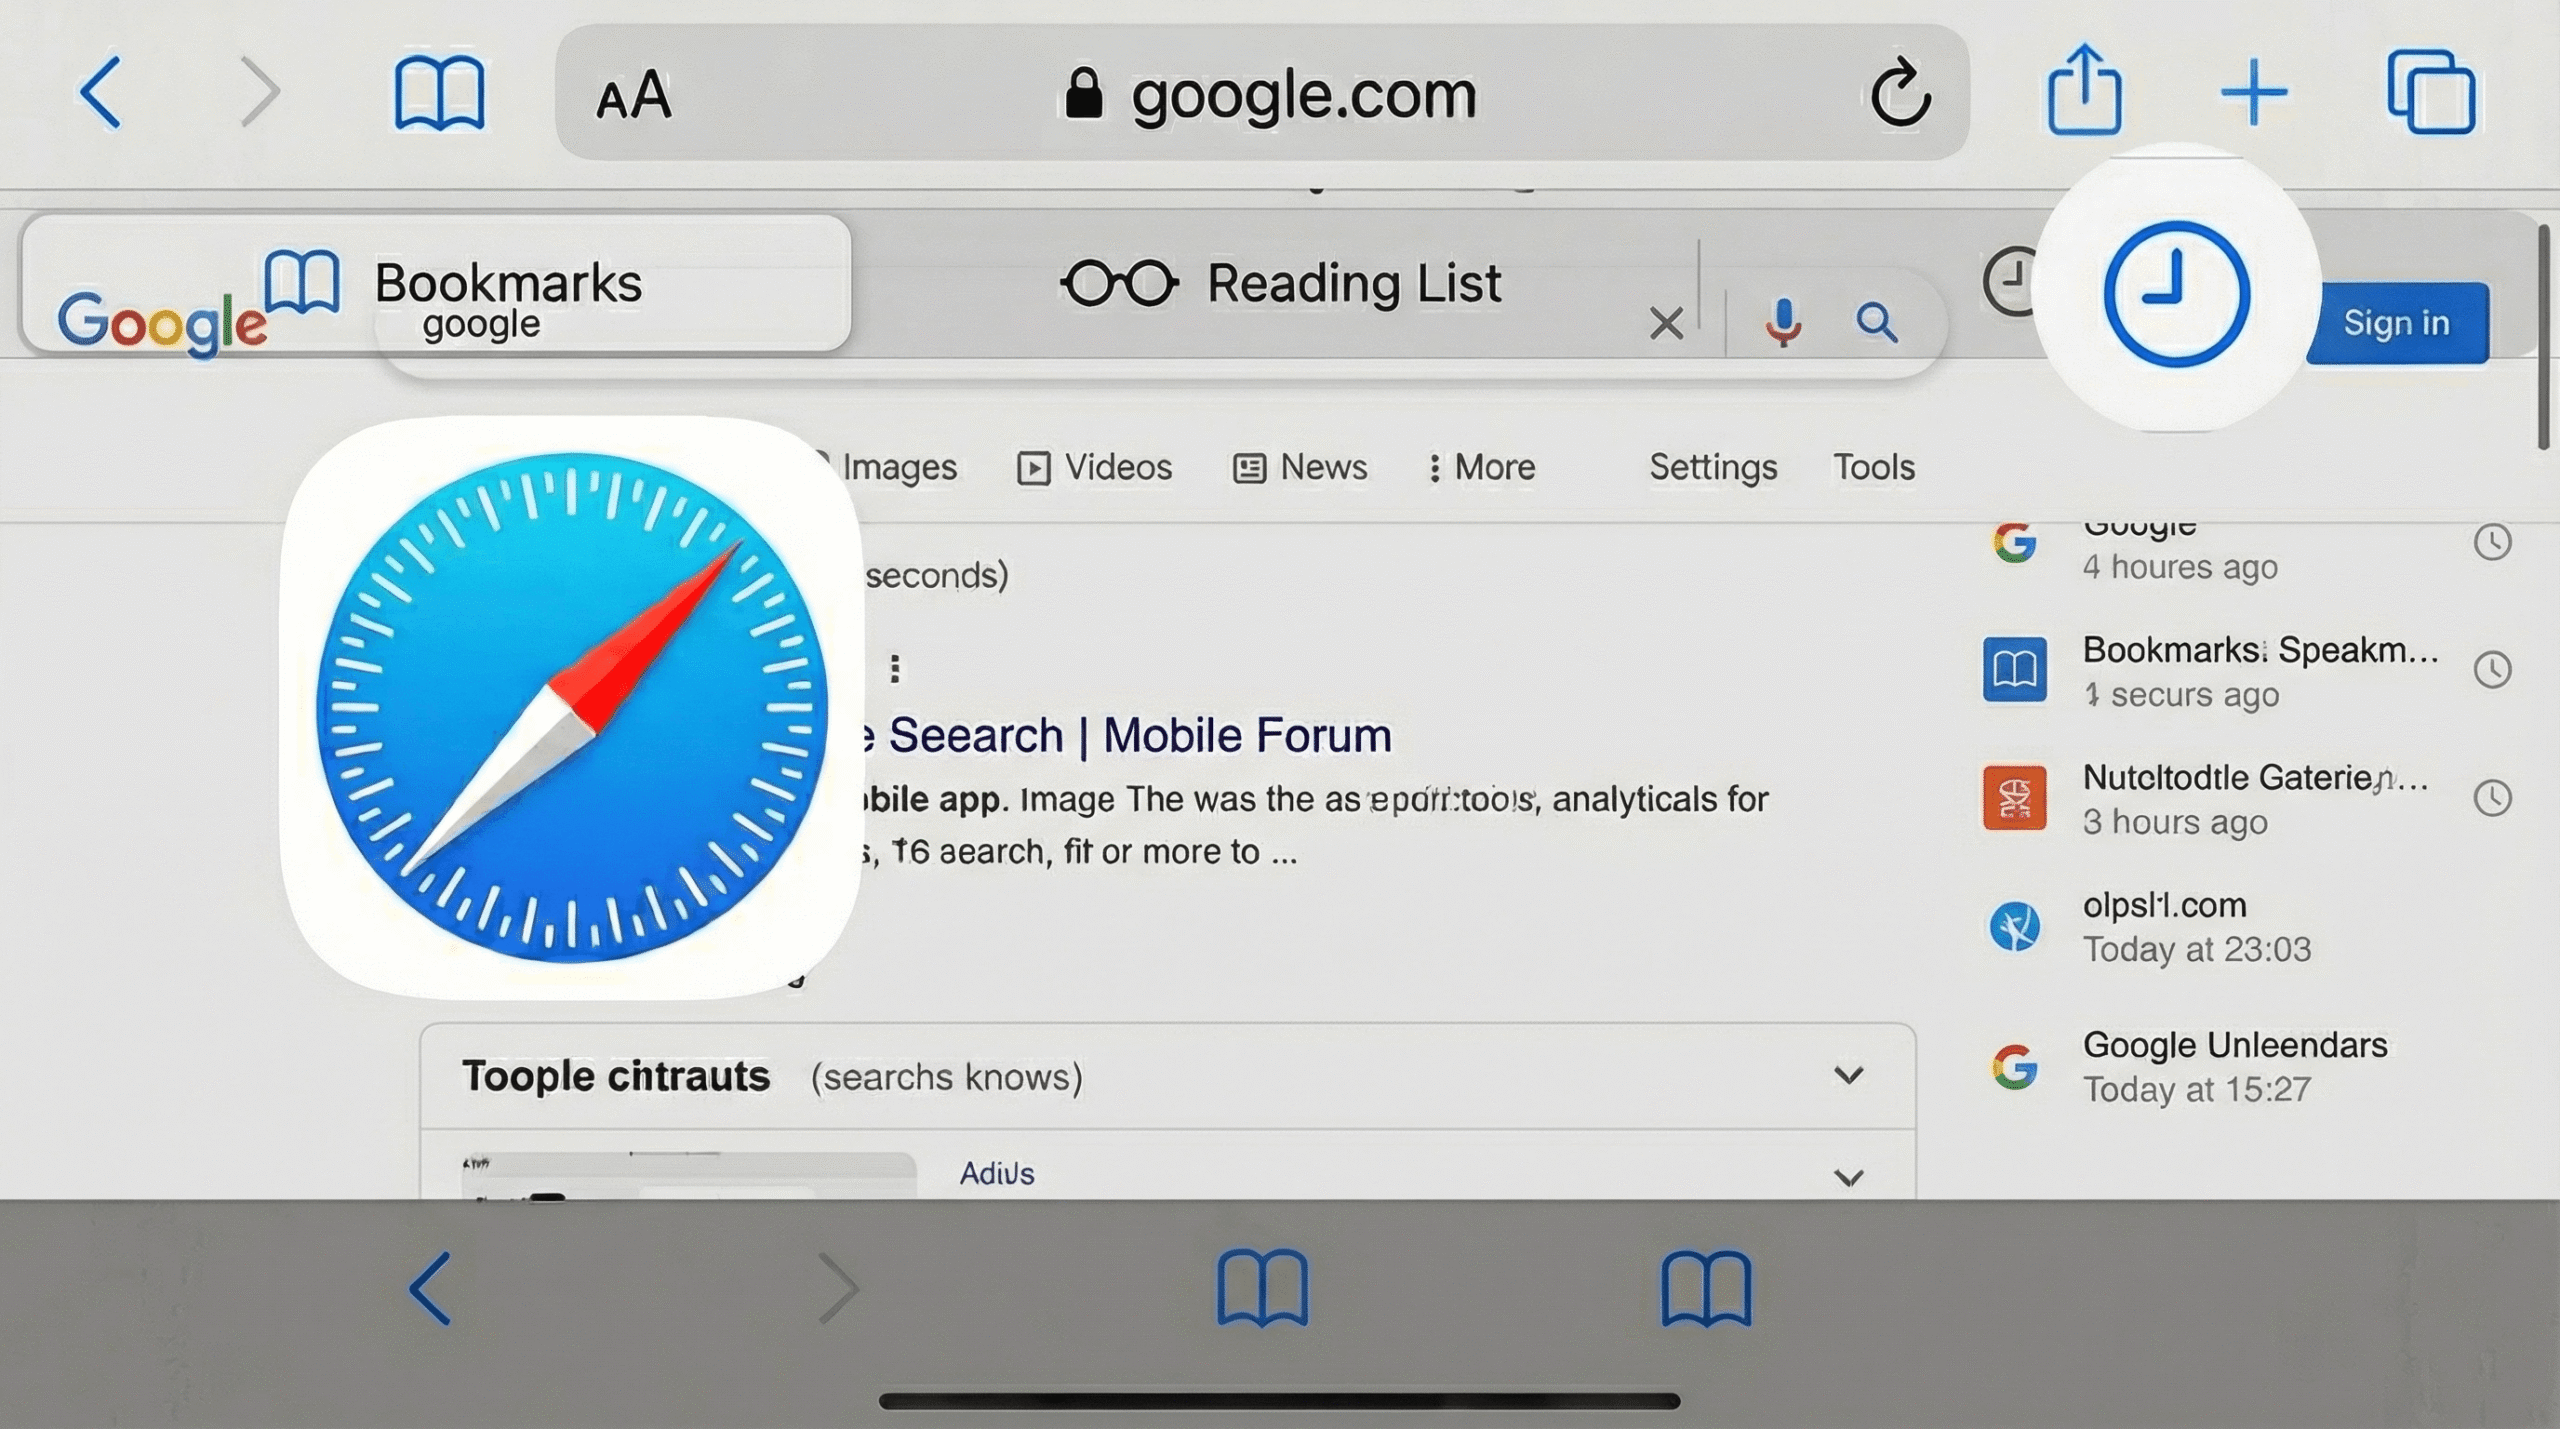
In the realm of digital wizardry, the humble screenshot reigns supreme. And on the hallowed grounds of macOS, the screenshot toolbar stands as a beacon of snipping prowess. So, let’s embark on a whimsical journey to master the art of snipping on a Mac.
To summon the screenshot toolbar, simply press the ever-reliable Command + Shift + 5. Behold, a magical floating window that grants you the power to capture any portion of your screen.
For a quick and dirty snip, simply click and drag the cursor over the desired area. The toolbar will automatically save the screenshot to your desktop. But fear not, dear reader, for there’s more to snipping than meets the eye.
If you’re feeling a bit more adventurous, you can customize your snip by selecting one of the toolbar’s options. “Capture Entire Screen” will grab everything in sight, while “Capture Window” will focus on a specific application window.
But wait, there’s more! The “Capture Selected Portion” option allows you to draw a custom shape around the area you want to snip. This is perfect for capturing just the right amount of information without any unwanted clutter.
Once you’ve captured your masterpiece, the toolbar will present you with a preview. Here, you can make any necessary adjustments, such as cropping or annotating the image. And when you’re satisfied with your creation, simply click “Done” to save it to your desired location.
Now, let’s talk about the elephant in the room: the “Record Screen” option. This magical button allows you to capture not only still images but also moving pictures. Perfect for creating tutorials, demos, or simply capturing those epic gaming moments.
So, there you have it, my fellow screenshot enthusiasts. The screenshot toolbar on macOS is your gateway to snipping glory. Whether you’re a seasoned pro or a screenshot newbie, these tips will help you elevate your snipping game to new heights.
Remember, the key to successful snipping is practice. So, go forth and snip to your heart’s content. And if you encounter any hiccups along the way, don’t hesitate to seek guidance from the wise sages of the internet. Happy snipping!
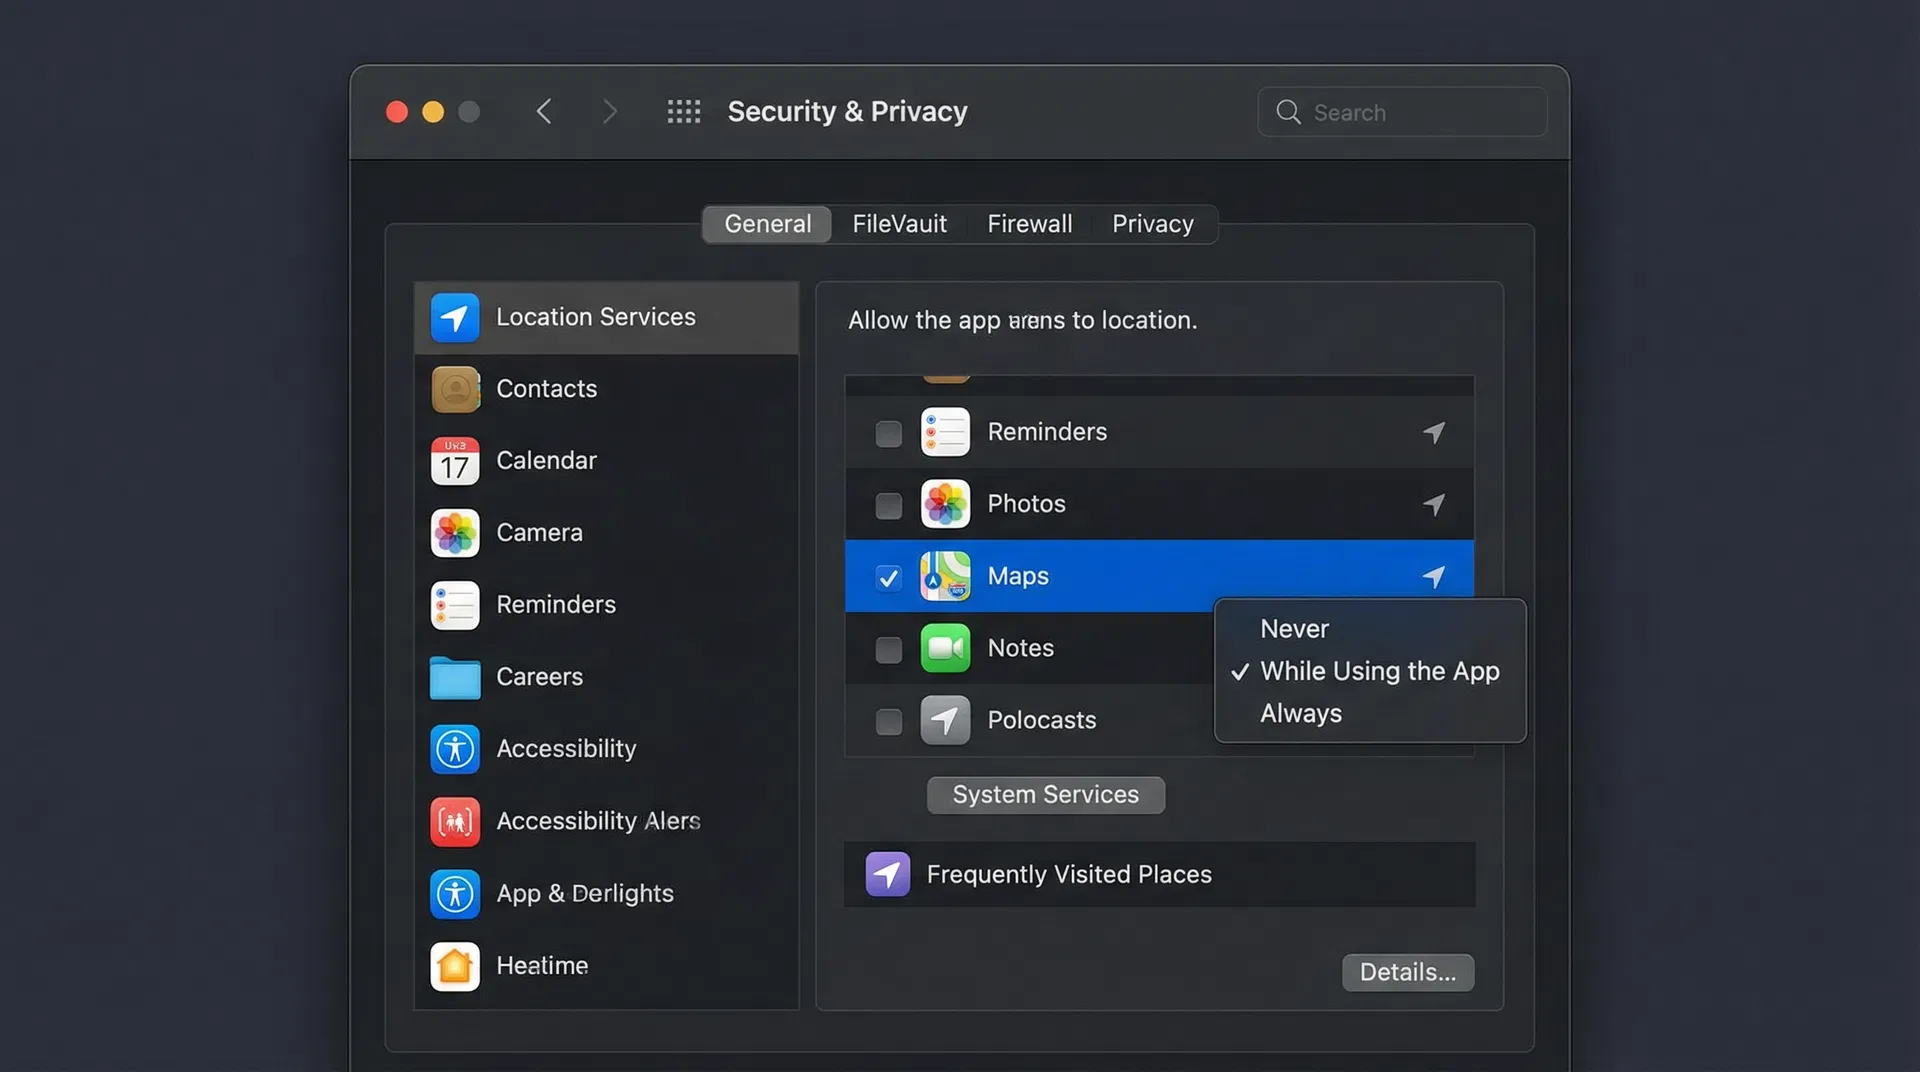
Custom settings: How to get snipping tool on Mac to work better for you
Snipping Tool, a handy utility on Mac, allows you to capture screenshots and annotate them with ease. But did you know you can tweak its settings to make it work even better for you? Let’s dive into the realm of custom settings and unlock the full potential of this snipping wizard.
First off, let’s talk about the delay. By default, Snipping Tool takes a screenshot immediately after you press the shortcut. But what if you need a moment to position your cursor or adjust the window? No worries! Head to the “Options” menu and adjust the “Delay before taking screenshot” setting. This gives you a few precious seconds to get everything just right.
Next up, let’s customize the file format. Snipping Tool saves screenshots as PNG files by default, but you can change this to JPEG, TIFF, or PDF. If you’re a space-conscious soul, JPEG is your friend. For high-quality images, TIFF is the way to go. And if you need to share your screenshots with others, PDF is a versatile choice.
Speaking of sharing, you can also customize the destination folder for your snips. By default, they’re saved to your desktop, but you can change this to any folder you like. This way, you can keep your screenshots organized and easily find them later.
Now, let’s talk about annotations. Snipping Tool offers a range of annotation tools, including pens, highlighters, and shapes. But what if you want to add your own custom annotations? No problem! Click on the “Annotations” menu and select “Custom.” Here, you can create your own shapes, arrows, or even add text. Unleash your inner artist and let your annotations shine!
Finally, let’s not forget about keyboard shortcuts. By default, you can take a screenshot by pressing Command + Shift + 3. But you can customize this shortcut to anything you like. Head to the “Keyboard” settings in System Preferences and search for “Screenshot.” Here, you can assign a new shortcut that’s easy to remember and use.
So, there you have it, folks! By customizing the settings in Snipping Tool, you can tailor it to your specific needs and preferences. Whether you’re a productivity ninja or a creative genius, these tweaks will help you capture and annotate screenshots like a pro. So, go forth and snip away, knowing that your snipping experience is now perfectly tailored to you!
How to add the snipping tool to the Touch Bar
Snipping, the art of capturing a portion of your screen, is a breeze on Mac. But what if you want to take it to the next level and add the snipping tool to your Touch Bar? Well, buckle up, my friend, because we’re about to embark on a hilarious journey to do just that.
First, let’s summon the snipping tool. Press Command + Shift + 5, and a floating toolbar will appear. Now, here’s the fun part: you can customize this toolbar to your heart’s content. Click on “Options” and check the box next to “Show in Touch Bar.”
Voila! The snipping tool is now a permanent resident on your Touch Bar. But wait, there’s more. You can also customize the Touch Bar button. Click on “Customize Touch Bar” in the System Preferences, and drag the snipping tool icon to your desired location.
Now, let’s put this newfound power to the test. Hover your cursor over the Touch Bar button, and a menu will pop up. You can choose to capture the entire screen, a window, or a selected portion. It’s like having a magic wand at your fingertips.
But here’s where the humor comes in. If you’re feeling particularly mischievous, you can use the snipping tool to capture embarrassing moments of your colleagues or friends. Just be prepared for the inevitable retaliation.
Speaking of retaliation, let’s not forget the “Save” button. It’s crucial to save your snips, or they’ll vanish into the digital abyss. But here’s the catch: the “Save” button is hidden behind a tiny arrow on the Touch Bar. It’s like a treasure hunt, but instead of gold, you’re searching for your precious screenshot.
So, there you have it, the ultimate guide to snipping in Mac with a touch of humor. Remember, with great power comes great responsibility. Use your snipping tool wisely, and may your screenshots bring you endless joy and laughter.
Conclusion
Snipping in Mac is a convenient way to capture and share portions of your screen. By utilizing the built-in screenshot tools or third-party applications, you can easily create and edit screenshots, annotate them, and save them in various formats. Remember to choose the appropriate tool based on your specific needs and preferences. With the techniques described in this guide, you can effectively capture and share your Mac screen content with ease.