


Microsoft Defender Antivirus plays a crucial role in safeguarding your Windows 11 system, offering a suite of protection features like real-time protection, cloud-delivered security, and network protection. However, there might be specific scenarios where you find the need to permanently disable Microsoft Defender. In this comprehensive guide, we’ll explore when it’s necessary to take this step and provide a detailed tutorial on how to do it.
When Should You Permanently Disable Microsoft Defender Antivirus?
Before delving into the process of disabling Microsoft Defender, it’s crucial to understand the implications. The antivirus provides a robust defense mechanism against various threats, and disabling it leaves your computer exposed to potential risks. However, there are situations where you might consider this option:
Application Installation Issues:
In some cases, Microsoft Defender may block the installation of a legitimate application. If you’ve verified the application’s authenticity and trustworthiness, temporarily disabling Defender can facilitate the installation process.
Conflict with Other Security Software:
If you are using third-party antivirus software that conflicts with Microsoft Defender, you might need to disable one to avoid interference and ensure smooth system operation.
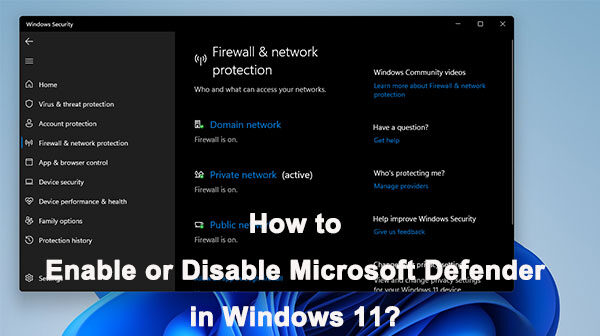
How to Permanently Disable Microsoft Defender on Windows 11
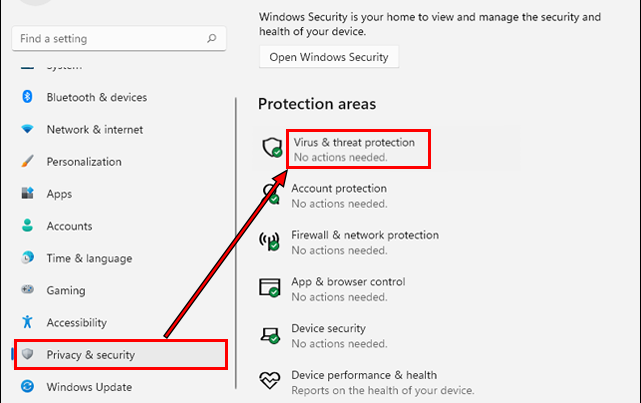
Step 1: Open Windows Security App
Navigate to the Windows Security app on your system. You can find it by typing “Windows Security” in the Start menu search bar.

Step 2: Access Virus & Threat Protection Settings
Click on “Virus & Threat Protection” in the Windows Security dashboard.
Step 3: Manage Settings
Under the Virus & Threat Protection settings, locate and click on “Manage Settings.”
Step 4: Disable Real-time Protection
Toggle off the switch next to “Real-time protection” to disable Microsoft Defender temporarily.

Step 5: Install the Application
Proceed to install the application that was being blocked by Microsoft Defender.
Step 6: Re-enable Real-time Protection
After the installation is complete, return to the Windows Security app, navigate to the Virus & Threat Protection settings, and toggle on the switch next to “Real-time protection” to re-enable Microsoft Defender.
Conclusion
While permanently disabling Microsoft Defender should be approached with caution due to the potential security risks, there are valid reasons for doing so, such as addressing installation conflicts or using alternative security solutions. Always exercise discretion and prioritize system security when making such decisions.
By following this comprehensive guide, you can navigate through the process of disabling and re-enabling Microsoft Defender on Windows 11, ensuring a smooth and secure computing experience. Remember to weigh the pros and cons carefully before deciding to permanently disable this essential security feature.
Frequently Asked Questions – Permanently Disabling Microsoft Defender on Windows 11
Q1: Why would I need to permanently disable Microsoft Defender on Windows 11?
A1: Permanently disabling Microsoft Defender should be approached with caution due to potential security risks. However, certain scenarios, such as conflicts with third-party antivirus or blocking legitimate applications, may necessitate this action. Always weigh the risks and benefits before deciding.
Q2: Can I temporarily disable Microsoft Defender for specific tasks?
A2: Yes, you can. If you encounter issues like Defender blocking a legitimate application, you can temporarily disable it. Turn off Real-time protection in the Windows Security app, perform the task, and then re-enable Real-time protection.
Q3: What security features do I lose by disabling Microsoft Defender?
A3: Microsoft Defender provides real-time protection, cloud-delivered security, and network protection. When disabled, you lose access to these protections, leaving your system vulnerable to various threats.
Q4: Are there alternatives to permanently disabling Microsoft Defender?
A4: Instead of permanently disabling, consider adjusting settings temporarily or exploring third-party antivirus solutions that work harmoniously with Microsoft Defender. This allows you to maintain a robust security posture.
Q5: How do I re-enable Microsoft Defender after disabling it?
A5: To re-enable Microsoft Defender, open the Windows Security app, navigate to Virus & Threat Protection settings, and toggle on the switch next to “Real-time protection.”
Q6: Will disabling Microsoft Defender affect my system’s performance?
A6: While disabling Defender may have a negligible impact on performance, the potential security risks should be carefully considered. Only disable it when necessary, and weigh the implications for your specific use case.
Q7: Can I use third-party antivirus alongside Microsoft Defender?
A7: Yes, you can use third-party antivirus alongside Microsoft Defender. However, ensure they are compatible to avoid conflicts. In such cases, you may not need to permanently disable Defender.
Q8: How do I know if an application is legitimate before disabling Microsoft Defender for installation?
A8: Verify the legitimacy of the application from trusted sources. Check reviews, official websites, and ensure it’s not flagged as malicious. Exercise caution and research before proceeding.
Q9: Can I disable specific components of Microsoft Defender instead of the entire antivirus?
A9: Yes, within the Windows Security app, you can manage specific settings such as Real-time protection. Temporarily disabling these components may address specific issues without turning off the entire antivirus.
Q10: Is it recommended to disable Microsoft Defender permanently for routine tasks?
A10: Generally, it’s not recommended to permanently disable Microsoft Defender for routine tasks. Its security features are crucial for ongoing protection. Only consider permanent disabling in specific scenarios after careful evaluation.