
")


Introduction
Gaming on a Windows PC can be an exhilarating experience, but it often comes with challenges such as lag, stuttering, and subpar frame rates. These issues can stem from a variety of factors including outdated software, inefficient system settings, and hardware bottlenecks. Knowing how to optimize Windows for gaming is essential to unlock your system’s full potential, ensuring smoother gameplay and faster response times.
This comprehensive guide will walk you through practical strategies to enhance your Windows environment for gaming. From updating drivers to tweaking visual effects and optimizing network settings, you’ll gain actionable insights to boost performance and reduce interruptions. Whether you’re a casual gamer or a competitive enthusiast, these tips will help you get the most out of your Windows gaming setup.
Preparing Your Windows Environment for Gaming
Updating Windows and Drivers
Keeping your Windows operating system and graphics drivers up to date is foundational for gaming performance. Updates often include critical security patches, bug fixes, and optimizations that improve compatibility with the latest games.
Why update?
– Ensures compatibility with new game releases
– Fixes known bugs that cause crashes or performance drops
– Improves security and system stability
– Unlocks performance enhancements and new features
How to update Windows:
1. Press `Windows + I` to open Settings.
2. Navigate to Update & Security > Windows Update.
3. Click Check for updates.
4. Install any available updates and restart your PC if prompted.
How to update NVIDIA graphics drivers:
1. Visit the [NVIDIA Driver Download page](https://www.nvidia.com/Download/index.aspx).
2. Select your GPU model and Windows version.
3. Download and run the latest driver installer.
4. Follow the on-screen instructions and restart your PC.
Alternatively, use the GeForce Experience app to automate updates.
How to update AMD graphics drivers:
1. Go to the [AMD Drivers and Support page](https://www.amd.com/en/support).
2. Choose your GPU model and Windows version.
3. Download and install the latest driver package.
4. Restart your computer to apply changes.
You can also use the AMD Radeon Software utility for automatic updates.
Managing Startup Programs and Background Processes
Many programs launch automatically when you start Windows, consuming valuable CPU, RAM, and disk resources that could otherwise enhance gaming performance. Background apps running during gameplay can cause lag and frame drops.
How to identify and disable unnecessary startup programs:
1. Press `Ctrl + Shift + Esc` to open Task Manager.
2. Click the Startup tab.
3. Review the list of programs and their impact on startup.
4. Right-click on non-essential programs and select Disable.
Managing background processes:
– In Task Manager, under the Processes tab, check for apps consuming high CPU, memory, or disk.
– Close or end tasks for unnecessary applications before launching your game.
– Consider using lightweight alternatives for software that runs constantly (e.g., cloud sync or messaging apps).
Using tools like MSConfig or third-party utilities such as Autoruns can provide deeper control over startup items.
Adjusting Power Settings for Maximum Performance


Windows power plans influence how your CPU and GPU manage power consumption. By default, many systems use balanced or power-saving modes that limit performance to conserve energy, which can hinder gaming.
Switching to High Performance mode:
1. Press `Windows + R`, type `powercfg.cpl`, and press Enter.
2. Select the High Performance power plan.
3. If not visible, click Show additional plans to reveal it.
Creating a custom gaming power plan:
1. In the Power Options window, click Create a power plan.
2. Choose High Performance as the base.
3. Name it (e.g., “Gaming Mode”) and click Next.
4. Adjust settings such as turning off sleep or display timeout to your preference.
5. Click Create and select the new plan when gaming.
This ensures your CPU and GPU run at their full potential without throttling due to power saving.
Optimizing Windows Visual and System Settings
Disabling Visual Effects and Animations
Windows’ visual effects and animations provide a polished user interface but consume system resources that could be better allocated to gaming performance. Disabling these effects can reduce overhead and improve responsiveness.
How to disable visual effects:
1. Press `Windows + R`, type `sysdm.cpl`, and press Enter.
2. Go to the Advanced tab.
3. Under Performance, click Settings.
4. In the Visual Effects tab, select Adjust for best performance to disable all effects.
5. Alternatively, choose Custom and uncheck specific effects like animations, shadows, and fade effects.
6. Click Apply and then OK.
_Disabling animations in Windows 10/11:_
1. Open Settings (`Windows + I`).
2. Go to Ease of Access > Display.
3. Toggle off Show animations in Windows.
This streamlines system responsiveness, freeing up CPU cycles for your games.
Configuring Game Mode and Xbox Game Bar
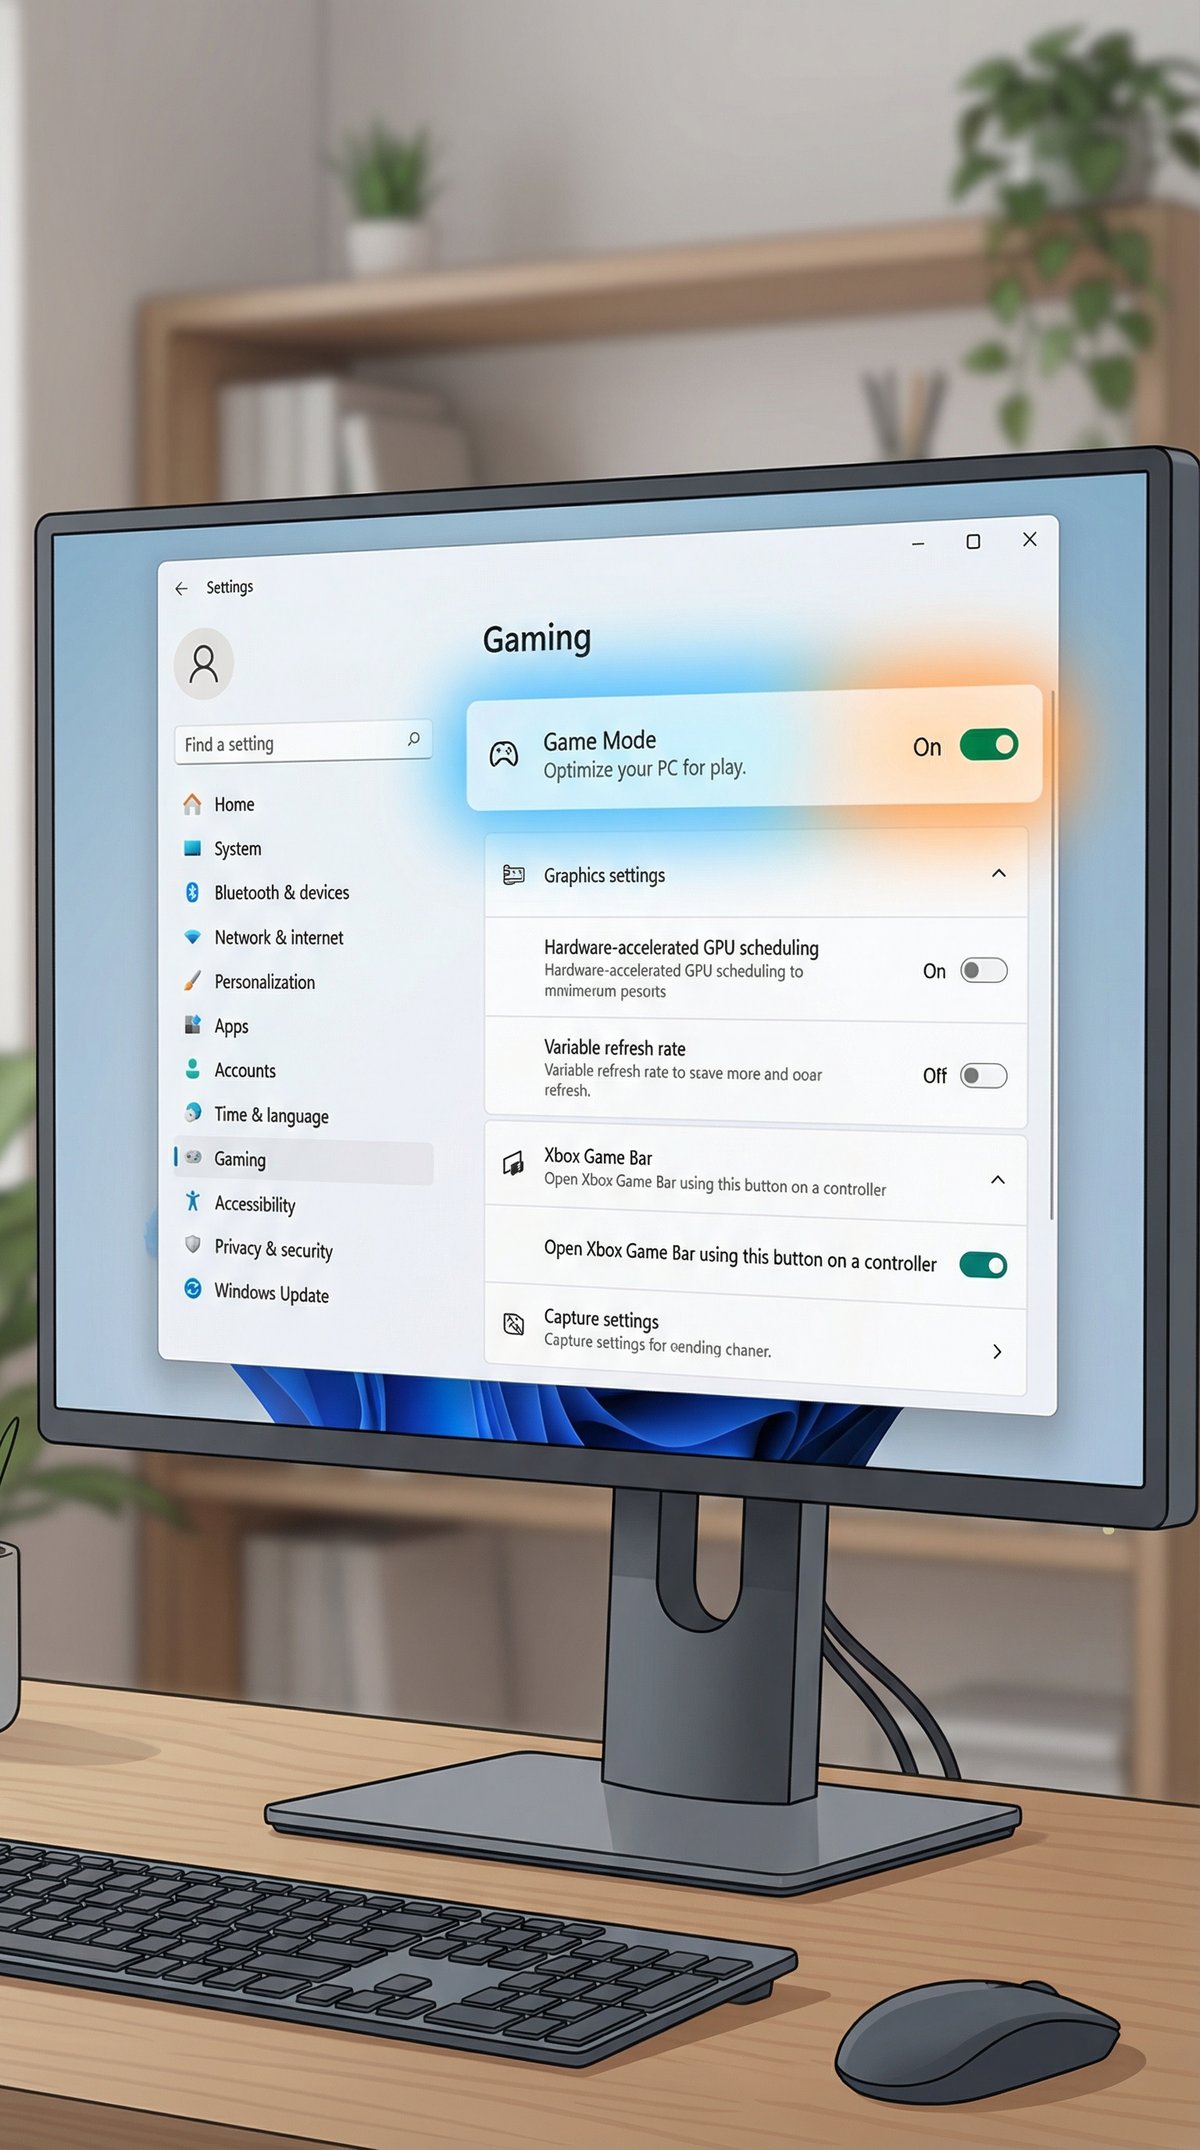
Windows Game Mode prioritizes gaming by allocating more system resources to your game and limiting background activity.
How to enable Game Mode:
1. Open Settings (`Windows + I`).
2. Navigate to Gaming > Game Mode.
3. Toggle Game Mode to On.
Benefits:
– Reduces background process interference.
– Optimizes CPU and GPU utilization during gameplay.
Limitations:
– Impact varies by system and game.
– May not benefit all titles equally.
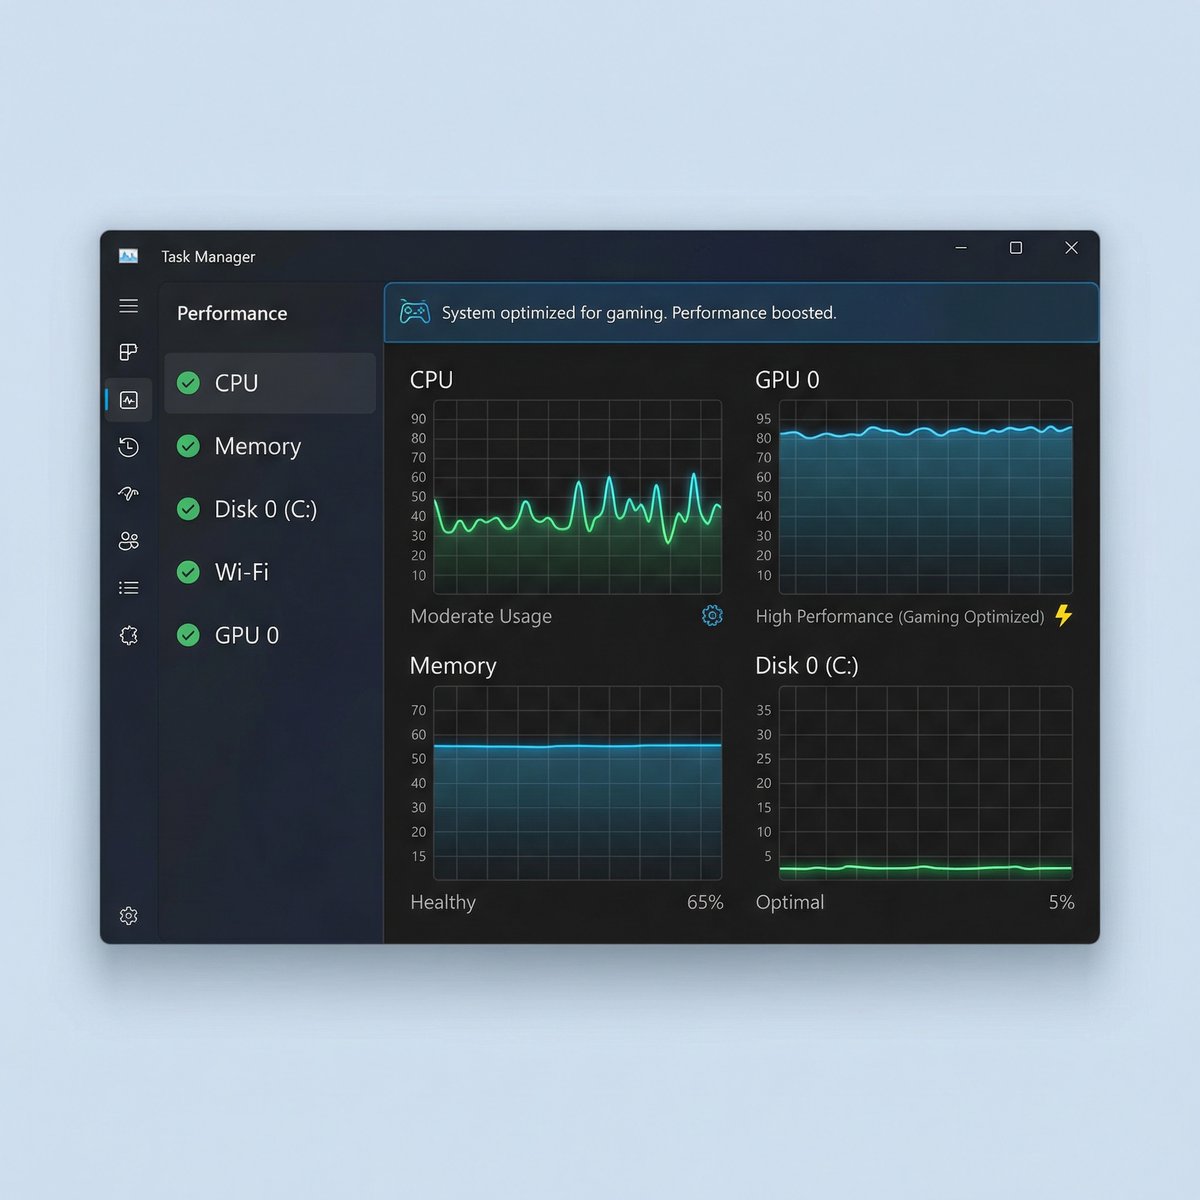
Using Xbox Game Bar:
The Xbox Game Bar offers handy tools like performance monitoring, screen recording, and quick access to social features.
How to enable and use Xbox Game Bar:
1. Open Settings > Gaming > Xbox Game Bar.
2. Toggle Enable Xbox Game Bar to On.
3. Press `Windows + G` in-game to open the overlay.
4. Use widgets to monitor FPS, CPU/GPU usage, and capture gameplay clips.
This can help diagnose performance issues or capture highlights without third-party software.
Managing Windows Notifications and Updates During Gaming
Interruptions from notifications or unexpected updates can ruin a gaming session and cause performance dips.
Using Focus Assist to minimize interruptions:
1. Open Settings > System > Focus Assist.
2. Choose Alarms only or Priority only during gaming hours.
3. Customize priority notifications if needed.
Focus Assist suppresses notifications, allowing uninterrupted gameplay.
Pausing Windows updates:
1. Go to Settings > Update & Security > Windows Update.
2. Click Pause updates for 7 days or set a custom schedule.
3. Avoid updating during gaming sessions to prevent automatic restarts or bandwidth usage.
Graphics and Display Optimization
Configuring GPU Control Panel Settings (NVIDIA/AMD)
Optimizing GPU settings can significantly improve frame rates and visual quality.
NVIDIA Control Panel recommended settings:
1. Right-click the desktop and select NVIDIA Control Panel.
2. Under Manage 3D Settings, adjust:
– Power management mode: Set to Prefer maximum performance.
– Texture filtering – Quality: Set to High performance.
– Vertical sync: Disable for reduced input lag (unless screen tearing occurs).
3. Apply changes.
AMD Radeon Settings recommended settings:
1. Right-click the desktop and open AMD Radeon Software.
2. Navigate to Graphics settings.
3. Adjust:
– Power Efficiency: Turn off for maximum performance.
– Texture Filtering Quality: Set to Performance.
– Wait for Vertical Refresh (V-Sync): Disable or set to application-controlled.
4. Save and apply.
Tweaking these settings balances performance and visual fidelity based on your hardware capabilities.
Adjusting Resolution, Refresh Rate, and V-Sync
Resolution:
– Higher resolutions (e.g., 4K) demand more GPU power and may lower frame rates.
– Lowering resolution can boost FPS but may reduce image sharpness.
– Find a balance that suits your monitor and preferences.
Refresh Rate:
– Higher refresh rates (e.g., 144Hz, 240Hz) provide smoother gameplay.
– Ensure your monitor supports the chosen refresh rate.
– Set refresh rate via Settings > System > Display > Advanced display settings.
V-Sync:
– Synchronizes frame rate with monitor refresh rate to prevent screen tearing.
– Can introduce input lag; disable if low latency is preferred.
– Use adaptive sync technologies like NVIDIA G-Sync or AMD FreeSync if available.
Adjust these display settings in your game’s graphics options or Windows display settings for optimal results.
Storage and Disk Optimization
Using SSDs for Faster Load Times
Solid State Drives (SSDs) offer dramatically faster data access speeds compared to traditional Hard Disk Drives (HDDs). This translates to quicker game load times, reduced texture pop-in, and smoother streaming of game assets.
Benefits of SSDs for gaming:
– Faster boot and game launch times
– Reduced in-game stuttering caused by data streaming
– Lower latency when loading new levels or assets
If you’re still using an HDD, upgrading to an SSD (SATA or NVMe) is one of the most impactful hardware improvements for gaming.
Disk Cleanup and Defragmentation Tips
Maintaining storage health helps prevent slowdowns that can affect gaming.
Disk Cleanup:
1. Search for Disk Cleanup in the Start menu.
2. Select the drive to clean (usually C:).
3. Check categories like Temporary files, Recycle Bin, and System files.
4. Click OK to remove unnecessary data.
Defragmentation (HDD only):
1. Open Defragment and Optimize Drives via Start menu.
2. Select your HDD and click Optimize.
3. Do not defragment SSDs as it reduces their lifespan.
Regular cleanup and defragmentation keep your storage efficient, minimizing load times and preventing lag spikes.
Network Optimization for Online Gaming
Reducing Latency and Improving Ping
Low latency is critical for responsive online gaming. Several Windows and network tweaks can help reduce ping and lag.
Tips to reduce latency:
– Close bandwidth-heavy apps (e.g., streaming, downloads) before gaming.
– Disable Windows Update delivery optimization:
1. Go to Settings > Update & Security > Delivery Optimization.
2. Toggle off Allow downloads from other PCs.
– Adjust network adapter settings:
1. Open Device Manager (`Windows + X` > Device Manager).
2. Expand Network adapters and right-click your adapter.
3. Select Properties > Advanced tab.
4. Disable features like Large Send Offload and Interrupt Moderation to reduce latency.
Configuring QoS and Prioritizing Gaming Traffic
Quality of Service (QoS) settings on your router can prioritize gaming packets, reducing lag during online sessions.
How to configure QoS:
1. Access your router’s admin panel (typically via `192.168.1.1` or `192.168.0.1` in a browser).
2. Log in with your credentials.
3. Locate the QoS or Traffic Management section.
4. Enable QoS and add your gaming device’s IP or MAC address.
5. Set high priority for gaming traffic or specific ports used by your games.
6. Save settings and reboot the router if necessary.
Consult your router’s manual for model-specific instructions. Prioritizing gaming traffic ensures smoother online gameplay even when other devices are active.
Advanced Tips and Maintenance
Overclocking Basics and Safety Tips
Overclocking increases your CPU or GPU clock speeds beyond factory settings to boost performance. While potentially rewarding, it carries risks such as overheating and system instability.
Basic overclocking steps:
1. Use reliable software like MSI Afterburner (GPU) or BIOS settings (CPU).
2. Increase clock speeds incrementally (e.g., +50 MHz).
3. Test stability with stress-testing tools (e.g., Prime95 for CPU, FurMark for GPU).
4. Monitor temperatures carefully.
5. Stop if crashes or artifacts occur.
Safety tips:
– Ensure adequate cooling before overclocking.
– Never exceed recommended voltage limits.
– Understand your hardware’s warranty implications.
If done cautiously, overclocking can yield noticeable gaming improvements.
Cooling Solutions and Hardware Maintenance
Proper cooling prevents thermal throttling, where CPUs or GPUs reduce performance to avoid overheating.
Recommended cooling practices:
– Use quality air or liquid cooling solutions.
– Ensure good airflow inside your case (intake and exhaust fans).
– Clean dust from fans, heatsinks, and vents regularly.
– Monitor temperatures with tools like HWMonitor or Core Temp.
Regular hardware maintenance prolongs component lifespan and sustains peak gaming performance.
Balancing Security and Performance
Antivirus and firewall software protect your system but can sometimes interfere with gaming by scanning game files or network traffic.
Tips to balance security and performance:
– Add games and launchers to your antivirus/firewall exclusion lists.
– Use lightweight security software optimized for gaming.
– Temporarily disable real-time scanning during gameplay if safe.
– Keep security software updated to avoid false positives and performance hits.
Maintaining security without sacrificing performance ensures a smooth and safe gaming experience.
Troubleshooting Common Performance Issues
If you encounter lag, crashes, or low FPS, use this checklist to diagnose and fix problems:
1. Check for driver conflicts: Reinstall GPU drivers using clean install options.
2. Monitor system temperatures: Overheating can cause throttling.
3. Scan for malware: Use trusted antivirus tools.
4. Close unnecessary background apps: Free up resources.
5. Verify game files: Use platform tools like Steam’s Verify Integrity feature.
6. Update DirectX and Visual C++ Redistributables: Essential for many games.
7. Adjust in-game settings: Lower graphics quality if hardware struggles.
8. Check for Windows updates: Sometimes fixes come from OS patches.
Following these steps helps identify bottlenecks and resolve common gaming issues.
Accessibility and Customization for Gamers
Windows offers numerous accessibility features and customization options to support gamers with diverse needs.
Enabling accessibility features:
– Open Settings > Ease of Access.
– Use options like Narrator, Magnifier, High contrast, and Closed captions.
– Customize keyboard and mouse settings for better control.
Custom input device support:
– Configure controllers, joysticks, or specialized peripherals via Settings > Devices > Bluetooth & other devices.
– Use software like Steam Input or manufacturer utilities to remap buttons and create macros.
– Adjust sensitivity and dead zones for precision.
These options ensure a comfortable and tailored gaming experience for all users.
Conclusion
Optimizing your Windows PC for gaming involves a combination of software updates, system tweaks, hardware considerations, and network adjustments. By following this guide on how to optimize Windows for gaming, you can significantly enhance your gaming performance, reduce lag, and enjoy a more immersive experience.
Regular maintenance—such as updating drivers, cleaning your system, and monitoring performance—will keep your setup running smoothly over time. Start applying these strategies today, and share your results to help others level up their gaming PCs!
Happy gaming!